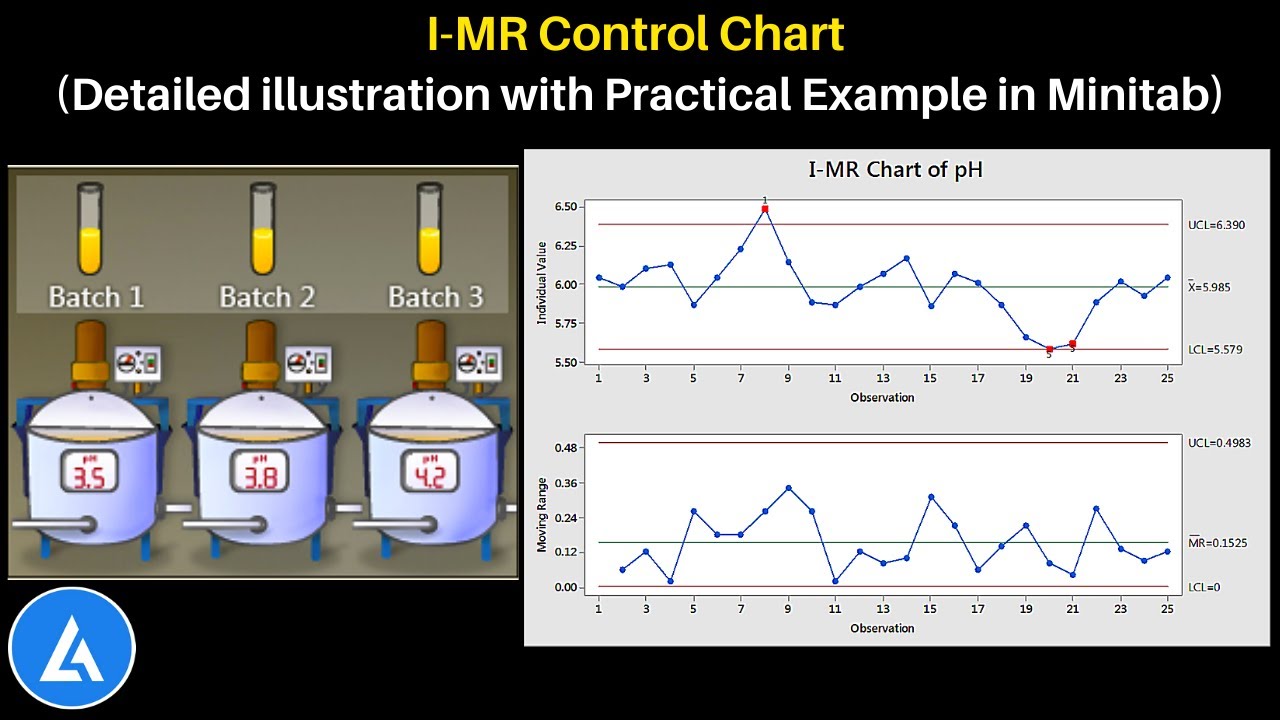
I-MR Control Chart: Detailed illustration with Practical Example LEARN & APPLY : Lean and Six Sigma 7:03 6 years ago 42 631 Скачать Далее
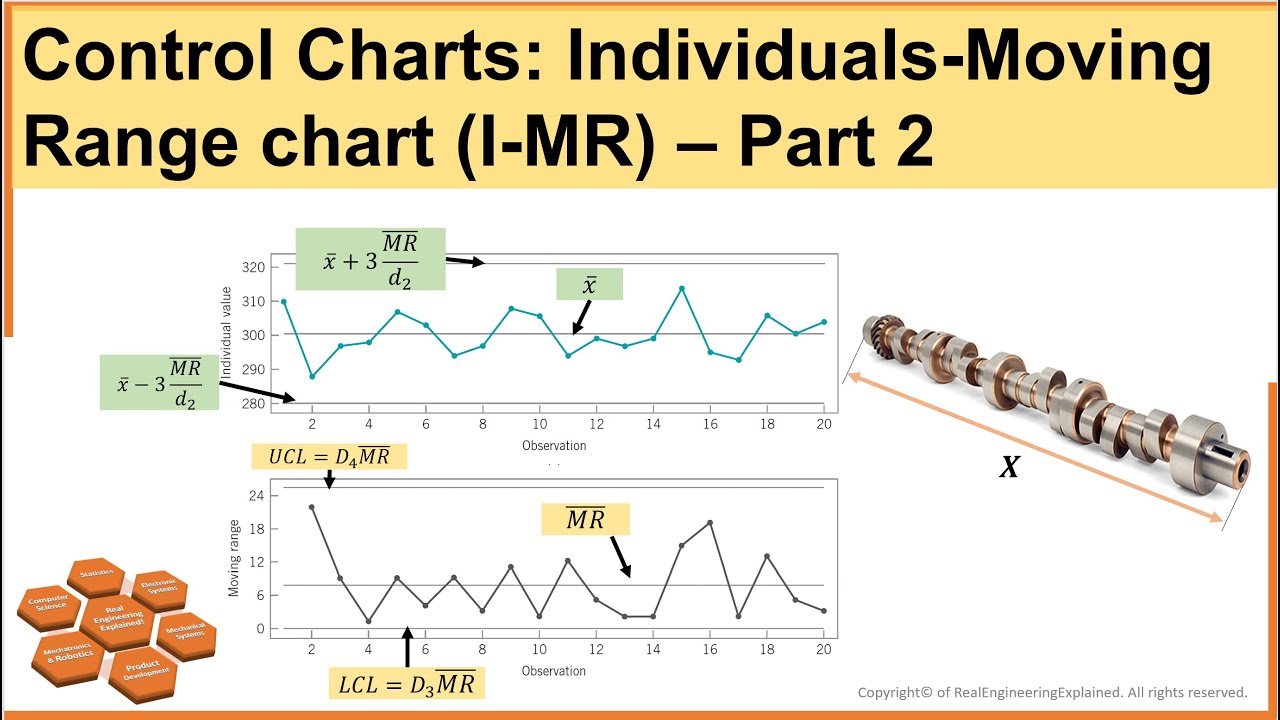
Part 2- Control Charts: Individual Moving Range (I-MR) chart | Statistical Process Control RealEngineeringExplained 11:42 3 years ago 8 265 Скачать Далее
Part 1- Control Charts: X-bar chart, R-chart, & I-MR chart | Statistical Process Control RealEngineeringExplained 20:41 3 years ago 11 320 Скачать Далее
I-MR (XmR) Control Chart Vs CUSUM Control Chart using Minitab with real detailed Illustration | HD| Abrar Knowledge 8:47 2 years ago 2 921 Скачать Далее
1.8.1 Individual and Moving Range (I-MR) Control Chart Six Sigma & Statistics by JD 4:52 7 years ago 30 204 Скачать Далее
Unlock the Power of ImR (XmR) Control Charts - SPC with Excel The Engineering Toolbox Channel 8:59 5 years ago 24 285 Скачать Далее
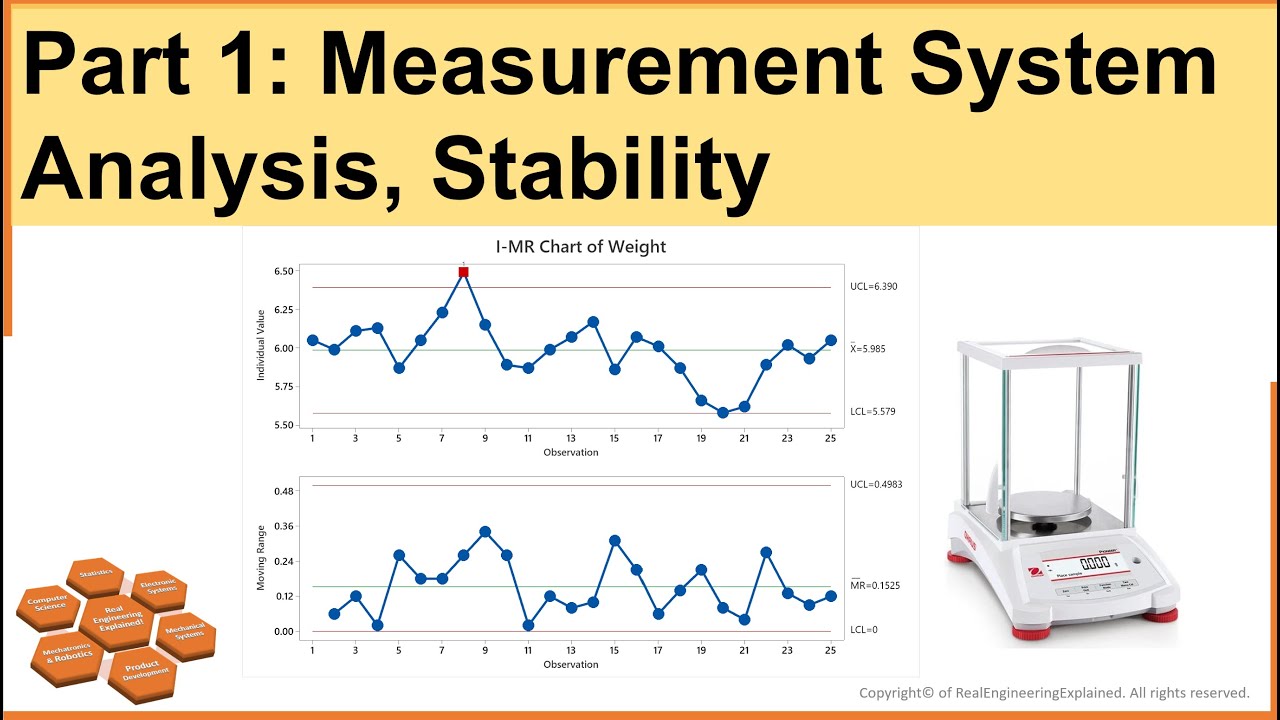
Part1: Measurement System Analysis, Stability | MSA | I-MR Control Chart | Statistical Methods RealEngineeringExplained 12:25 3 years ago 14 606 Скачать Далее